Cowboy Programming Game Development and General Hacking by the Old West

July 10, 2008

CheckWord – My iPhone Scrabble word checker app

Filed under: Game Development — Mick West @ 5:48 pm

I’ve been working on a iPhone game (NineSpeed) on and off for a while – although recently it has been mostly off.   So when I got an email from Apple last Wednesday, telling me to submit my game by Monday to get in the app store for launch, then this spurred me into some kind of action.

Of course I was not going to finish the game by Monday, as I still had a load of UI stuff to do, and it was getting annoying, as I’d done everything in OpenGL up to that point, and starting to bolt on the necessary iPhone OS stuff (flipping views, saving states, entering text) was a bit intimidating.

So it struck me I could kill two birds with one stone – I could write a simple app for launch that would include all the UI elements I was lacking in NineSpeed.     I needed something simple that I could do in three days, but also something useful, so it would actually get published (although that did not turn out to be as big an issue as I thought it might).     And doing this would also let me go through the submission process, which might raise some issues in advance of me doing it for an app I hoped people would buy.

So I decided to do a Scrabble word checker.   It would just input a word and then tell you if it was good or bad to play in Scrabble.   There would also be an options screen where the user could change dictionaries.   The finshed app, “CheckWord” is now on the store:

http://phobos.apple.com/WebObjects/MZStore.woa/wa/viewSoftware?id=284938074&mt=8

STARTING FROM SCRATCH

iPhone development is done using two applications on the Mac:   XCode and Interface Builder.     These two apps are closely linked.     XCode lets you create, edit, build and test code.   Interface Builder lets you build pretty screens with buttons and suchlike, and link it up with the code you made in XCode.

XCode will make a basic iPhone application for you.   Simple choose “New Project”, and you get to pick from a few basic templates.   I chose “Utility Application”, which gives you two “views”, and a button that flips between them.

A “view”, as it turns out, is nothing complicated.   It’s just a region of a window.   A window is just the entire iPhone screen – they are resizable on the Mac, but on the iPhone you can only rotate them.   It’s perhaps a little confusing.

First confusion is that there are actually three views:   Root, Main and Flipside.   There are also three “Root Controllers”, which are objects that control the views.   The template sets all these up so that it displays the main view with the root view overlaid on top of it, and you can press a button to flip to the flipside view.   So in theory all I had to do was add a text entry field and some text display fields to the main view, and hook them together with some code, and then add some options on the flipside screen.

FIDDLY

So that’s what I did.   It’s bit fiddly, and for reference I used the “Hello World” sample app that inputs some text and then displays it on screen.     So my app ended up being an amalgam of the two.   I started with “Utility Application”, and then pasted in bits of “Hello World”

That worked reasonably well for the code, but of the Interface Builder (IB) stuff, I had to go in and visually check each element to see how it was connected.       The connections between IB and the code are pretty simple.   There’s an IBOutlet, which is just a data field that refers to the button or label, or whatever. Then there’s an IBAction, which is a function you define that is called when some event occurs on an IB object.

To actually hook these up, you just define them in the code, then IB will detect them, and when you right click on the appropiate object you get a list of outlets and actions and can drag them to the required place.

It’s not quite that simple though, and for a first-timer like myself, it can be rather confusing.   You’ve got all your object, but you also have these other objects:   the “File’s owner”, the “First Responder” and sometimes the “App Delegate”.   The “File’s Owner” you have to hook up to the class of the correct object in your code.   If this object is an UIApplication, then there’s a ‘delegate’ outlet, which you set to the App Delegate object, which is set to the class of that object.     Then either the File’s Owner or its delegate will have the outlets, and the “First Reponder” will have the actions.

If that’s hard to understand, it’s because I don’t fully understand it, and so I can’t explain it very well.   I’m still at a relativly early stage of learning this particular model of programming, and it will take a while before I get the nuances.

ACTUAL CODE

So all that’s just setting up connections between IB and the code.   What about actual code for chcking words?   Well, it turns out that that’s the easiest code to write.   Not because it’s any simpler, but because I know EXACTLY what the code is doing, since it’s just some raw C++ whizzing though arrays of bytes and doing some comparisons, simple stuff like:

bool CWordList::IsValid(const char *p_word)
{
	if (strlen(p_word) <= 1)
		return false;
	for (int i=0;i < m_words;i++)
	{
		if (strcasecmp(p_word, mp_words[i]) == 0)
			return true;
	}
	return false;
}

Nothing complicated there, just some nice simple cowboy code :)

SUBMITTING

The process of submitting the app to the app store was actually fairly painless in comparison with some things I’ve had to do in the past.   There were lots of instructions, and while there were a few problems, if you simply follow the instructions, all will be well.   The one problem I had was that at some stage the distribution build had to actually be built before some signing thing could be changed, and then it had to be built again.

I packed it up, uploaded it with some screenshots, and a few hours later it was approved.   Nice.

Anyway, in closing, here’s a list of the various discreet things I learned how to do, mostly for my own reference.

LOAD A BINARY FILE

Add the binary file to your “Resources” in xcode so it goes into the “bundle”.   Then code to load “TWL06.txt” into some C++ style allocated memory is:

				NSString *filePath = [[NSBundle mainBundle] pathForResource:@"TWL06" ofType:@"txt"];
				NSData *fileContents = [NSData dataWithContentsOfFile:filePath];
				int len = fileContents.length;
				char *p_data = new char[len];
				[fileContents getBytes:p_data];

TEXT INPUT

Create a UITextField object in IB, and one one the view controller’s interface, which you have to also decorate with UITextFieldDelegate, like:

@interface MyViewController : UIViewController  {
	IBOutlet UITextField *textField;
...
@property (nonatomic, retain) UITextField *textField;

You then override textFieldShouldReturn to call resignFirstResponder and return YES if you want the keyboard to go away after text entry. In my case I wanted to it stay, and I also check the word as soon as the text is entered, so I have:

- (BOOL)textFieldShouldReturn:(UITextField *)theTextField {
	if (theTextField == textField) {
		//[textField resignFirstResponder];
		[self checkWord:nil];
	}
	return NO;
}

SAVING STATE

NSUserDefaults is what you want, it stores a dictionary of objects. In applicationDidFinishLaunching, you check for the existence of it, and create a default if needed:

NSString *kDictionaryIndexKey = @"dictionaryIndexKey";
NSString *kAcceptableSwitchKey = @"acceptableSwitchKey";
NSString *kNameKey = @"nameKey";
...
	NSString *testValue = [[NSUserDefaults standardUserDefaults] stringForKey:kNameKey];
	if (testValue == nil)
	{
		printf("Dictionary Index key not found, creating default defaults\n");
		// since no default values have been set (i.e. no preferences file created), create it here
		NSString *name = @"CheckWord";
		NSDictionary *appDefaults =  [NSDictionary dictionaryWithObjectsAndKeys:
									  name,kNameKey,
									  [NSNumber numberWithInt:0], kAcceptableSwitchKey,
									  [NSNumber numberWithInt:0], kDictionaryIndexKey,
									  nil];

		[[NSUserDefaults standardUserDefaults] registerDefaults:appDefaults];
		[[NSUserDefaults standardUserDefaults] synchronize];
	}

Then you read them like this:

	[acceptableSwitch setOn:[[NSUserDefaults standardUserDefaults] integerForKey:kAcceptableSwitchKey]];
	dictionary.selectedSegmentIndex = [[NSUserDefaults standardUserDefaults] integerForKey:kDictionaryIndexKey];

(That reading the options to set the switch the the multi-segment button used in the options screen)

And write them like this:

- (IBAction) changeDictionary:(id)sender
{
	dictionaryIndex = dictionary.selectedSegmentIndex;
    [[NSUserDefaults standardUserDefaults] setInteger:dictionaryIndex forKey:kDictionaryIndexKey];
}

That’s an Action that takes the dictionaryIndex from the multi-segment button, and stores it in the user defaults.

That’s it, the options will be saved, and persist between sessions, and power-downs.

FLIPPING THE SCREEN

Just use the “Utility” template code.

MAKING THE ‘i’ LESS FIDDLY

This was an annoying one. The ‘i’ button in the sample worked fine in the simulator, but on the actual iPhone, it was very fiddly, and often seemed not to work for some reason. To fix this, I made a custom button, and used a screen-grabbed image of the ‘i’ instead. I made this 44×44 pixels with a lot of transparency (although I think you can just re-size any custom button, regardless of the bitmap). This improved things a lot.

July 6, 2008

CheckWord

Filed under: Game Development — Mick West @ 8:42 am

UPDATE Nov 24th 2010: Checkword 1.4 is in now the Apple approval queue, and will fix the problem with no keyboard, as well as adding a “Words With Friends” specific word list, and using less memory thanks to better list compression. Hopefully should be getting out in a few days. Sorry I did not test it before iOS4.2 was released. My bad!

CheckWord is an iPhone/iPod Touch application that checks if a word is good or bad in games like Scrabble. Quicker than using a dictionary, easier than using a computer. Ideal for for both casual and tournament use. Now with an added word generator and wild-card pattern matcher.

FEATURES:

– Uses the latest official TWL or SOWPODS word lists
– TWL 2006, with 178,691 words for North America
– SOWPODS 2006, with 267,751 words for international play
– No internet connection needed, so you can be in airplane mode
– Instant results, just type in the word and hit the search button
– Judge multiple words at once, according to tournament rules.
– Generate words from your letters and a board letters
– Solve crosswords by entering in the known letters
– Make anagrams, find words and make word lists with wildcard searches

CHECKWORD INSTRUCTIONS

The main purpose of CheckWord is to see if words are good or bad for play in Scrabble and other similar games. Because of this it does not include proper nouns (names and other words that are normally capitalized), such as “MICHAEL” or “ARIZONA”. However, some proper nouns have other uses, such as “HOLLY” (a tree), and “TEXAS” (a part of a steamboat), and so are included. I did not make the word lists, they are official lists created by various Scrabble associations.

To check a word, type it in and touch “Search”. You will be told if the word is “Good” or “Bad” to play in Scrabble.

To clear the display, just touch “Search” again.

In the options, you can select “Use ‘Acceptable'” to change the messages to “Acceptable” and “Unacceptable”, as this is the language used in official Scrabble tournaments.

If you enter multiple words from a single play, like “AT AA TAN”, then CheckWord will report GOOD or ACCEPTABLE only if all the words are correct. If one or more words are incorrect, then CheckWord will report BAD or UNACCEPTABLE. The incorrect word will not be highlighted, according to official Scrabble tournament rules.

MAKEWORD INSTRUCTIONS

To toggle to MakeWord, touch the “MakeWord” button in the top left. Use the same button to return to CheckWord. In both CheckWord and MakeWord you can press the ‘i’ in the top right to go to the options and info screen.

You can enter the “Letters” in your rack and/or a “Pattern” to fit those letters to. Use the ‘.’ for a blank tile or empty space, and use ‘@’ to represent an unknown number of letters in the pattern (see below for examples).

Letters Only:
If you only enter Letters, then MakeWord will make all the possible words it can make with those letters (and blanks, if you enter any). Longest words will be shown first, including any full-length anagrams.

Letters Only Examples:
RETAINS = All words you can make with the letters of RETAINS (there are 262 in TWL, 343 in SOWPODS)
RETAI.. = All the words you can make with RETAI and two blanks
… = All the three and two letter words

Pattern Only:
If you only enter a pattern, then MakeWord will assume you have enough blanks to make any word that fits that pattern. You would use this to find words that fit a particular pattern of letters, such as in a crossword. You can also make quick word lists for practice. It’s very powerful, but easy to do the simple stuff.

Pattern Examples:
.. = All the two letter words
… = All the three letter words
P..TZ.L = Word with some letters missing (PRETZEL)
THW@ = All words starting with THW
@PS = All words ending in PS
@THP@ = All words that contain THP
THP = Shortcut for @THP@
@.THP.@ = All words that contain THP, but do not start or end with it
PR@NT = All words that start with PR and end with NT
PR…NT = All seven letter words that start with PR and end with NT
JO.. = All four letter words that starts with JO

Letters and Pattern:
If you both letters and pattern, then MakeWord will generate words that fit the pattern using just the letters and blanks you specify. You would use this to fit your rack to a specific place on the board, or to generate more specific word lists.

Letters and Pattern Examples:
RETAINS + @AB@ = All words fitting some letters from RETAINS before, after or around AB
RETAINS + AB = Shortcut for the above
RETAINS + @AB = All words fitting letters from RETAINS before AB
RETAINS + AB@ = All words fitting RETAINS after AB
RETAINS + @.AB.@ = All words fitting RETAINS around AB
RETAINS + …. = All four letter words made from RETAINS
Q… + …. = All four letter words containing a Q (A ‘Q’ with three blanks, fitted into four spaces)
AAA.. + ….. = Five letter words with 3 ‘A’s
NOOMTRS + A…….Y = A nine letter word with your rack between A and Y (ASTRONOMY)
A… + G…. = A five letter word starting with G that contains an A

If you have any problems with CheckWord, then post a comment here, or email me at: mick@cowboyprogramming.com

If you have a problem or suggestion, then a great way to letting me know what the issue is is to take a screenshot by pressing the home and power buttons together. The screen will flash white, and a screenshot will be saved in your photo roll. Then email it to me at:
mick@cowboyprogramming.com with a note explaining the problem/suggestion.

Possible future features:

  • French, Spanish and other language support.

I’m interested in supporting other language, but I need to find appropriate word lists, and possibly some help translating “Enter word(s), good/bad, acceptable/unacceptable”.   Let me know if you can help.

FAQ:

Q: How do I clear the display?
A: Just press search again.

Q: How do I restrict the length of words in MakeWords?
Enter a patter with the same number of dots as the length of word you want.   Add a ‘@’ to make that the minimum length.

June 6, 2008

Perforce SSH from Windows and Mac to Linux

Filed under: Game Development — Mick West @ 6:24 am

I’ve been traveling a bit, but still want to do development in a nice tidy way.     At home I had a Perforce server running on a big local machine, and I could connect to it on port 1666 from my PC, my laptop and my Mac.   But out of town I’ll only have my laptop and a Mac mini.   I did not think my PC would keep running for long enough, so I decided to set up a Perforce server on my GoDaddy Linux host (I have a virtual private server with root access).   Of course, then security is a concern.

Assuming a Perforce server running on a remote Linux machine, and clients running both on Windows Vista and Mac OS X 10.5.3. How do we make the connection fully secure using SSH?

When you initially set up a Perforce server on a Linux box, by default it’s open to the world, listening for incoming connections on port 1666. To provide initial security, I simply blocked port 1666 at the firewall level (actually all ports are blocked by default, so it’s more accurate to say I did not open the port)

Next, we want to set up SSH tunneling. This involves a different procedure for each machine. The concept is fairly simple, but initially seems confusing.     The main point I failed to grasp was: you don’t need to do anything on the Linux machine! If it’s already accepting your SSH connection (which presumably is how you are starting Perforce), then it’s already set up to do port forwarding.

On the Mac, we have the software built in, and we just open a terminal window, and type:

ssh -l cowboy -L 6933:cowboyprogramming.com:1666 cowboyprogramming.com -p6789

then enter the password.   You then keep that terminal window running (I just minimize it).

There are three numbers here which are important:

6933 – the port that you want your client to think the server is using for P4
1666 – the port that the server actually is using for P4
6789 – the port you use for ssh, this is 22 by default, I’ve chosen a random port for obscurity (this is not the port I use)

On the Vista or XP PC/Laptop, we use PuTTY, and I just modified the original SSH connection (already set with the correct port, etc).

  • Connections/SSH/Tunnels
  • Source Port: 6933
  • Dest cowboyprogramming.com:1666

Now to connect to the server at cowboyprogramming, we use the p4 port of 127.0.0.1:4242 and ssh will automagically tunnel this over the SSH connection, and it will come out the other end at port 1666

That’s really all there is to it.

May 30, 2008

Measuring Responsiveness in Video Games

Filed under: Game Development — Mick West @ 9:59 am

In this article I suggest that the specifications of a video game should always include a measure called “response time” (also called “lag”, “controller lag”, or “input latency”). Response time is defined as the time between the player using the controller, and the results appearing on the screen. Example: Pressing the trigger button on the controller fires a gun on the screen. Video game response time can be measured with a cheap digital camera, and I explain how.

THE PROBLEM

The “feel” of a game is in large part described in terms of how “responsive” it is. Very often a game will be described as “laggy” or “sluggish”, and by contrast other games will be “tight” or “fast”. I have previously described the technical reasons behind games lacking responsiveness, but I offered no way of measuring the response time, and so the developers have to rely on their own assumptions about the way they read the controller and present the results, and combine that with the subjective assessments of the test department.

Having an accurate way of measuring response time allows the developer to both verify their own assumptions (hence detecting bugs that are adding to the response time), and to provide an objective reference to the claims of the testers regarding the “tightness” of the game. Perceptions of changes in small variables like response time can vary by individual, and being able to measure it objectively will allow you to see if it has actually changed, and by how much.

Game developers also have to make the decision of whether to go with 60fps or 30fps. 60fps will generally have half the response time of 30fps, which can be a deciding factor (along with the smoother motion, which is visually more appealing on fast moving games). However for some games there are other factors that influence the response time. Having an accurate way of measuring the response time allows the developer to more accurately and objectively make a decision on if 60fps is necessary, or if they simply need to tighten up their 30fps game.

MEASURING RESPONSE TIME

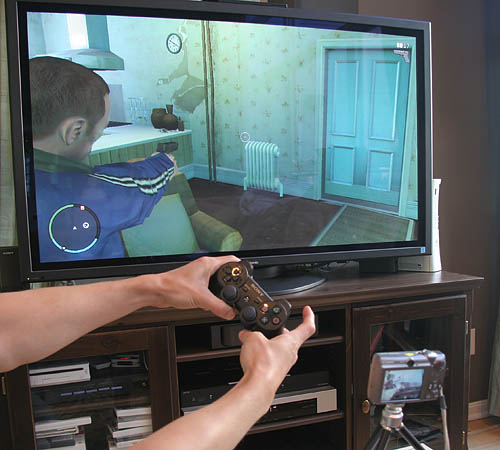
Measuring response time is very simple, and consists merely of videoing the screen and the controller at the same time with a video camera that records at 60 fps, and then playing this back and counting the frames between button press and the screen response.

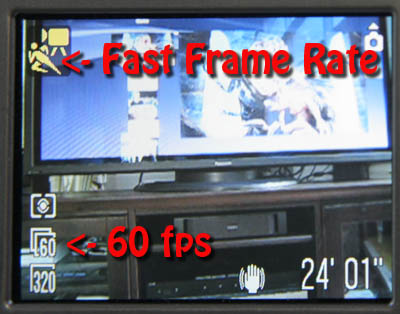
The camera I use is an old model Canon Powershot SD800IS, a relatively cheap camera. You need a camera that supports 60 fps (frames per second) recording. This may be listed as “Sports Mode”, or “Fast Frame Rate”. I believe many of the current line of Canon Powershot SD cameras have this feature, including the popular and cheap Powershot SD770. This is a very popular brand of camera, so it is highly likely that someone on your team will own one.

Set the camera to movie mode, change to to the appropriate mode for 60fps (press the “func” button on the Canon SD and select “Fast Frame Rate”).

Then set it up to point at the television. You don’t need to get the whole screen in shot, just enough so you can see the game actions that will result from your button presses. Make sure that the controller is roughly in focus and hold it angled so that the button presses can clearly be seen.

CALIBRATION AND MEASURING

Plasma and LCD televisions introduce lag of their own, as they frequently do some additional processing to a picture before they display it. This can be as much as a few 60ths of a second, which can be quite significant. Ideally you would do your testing on a CRT Television, which should have no additional lag (the cheaper the better). Your flat panel TV might also have a “game mode” which will reduce (but not eliminate) the lag.

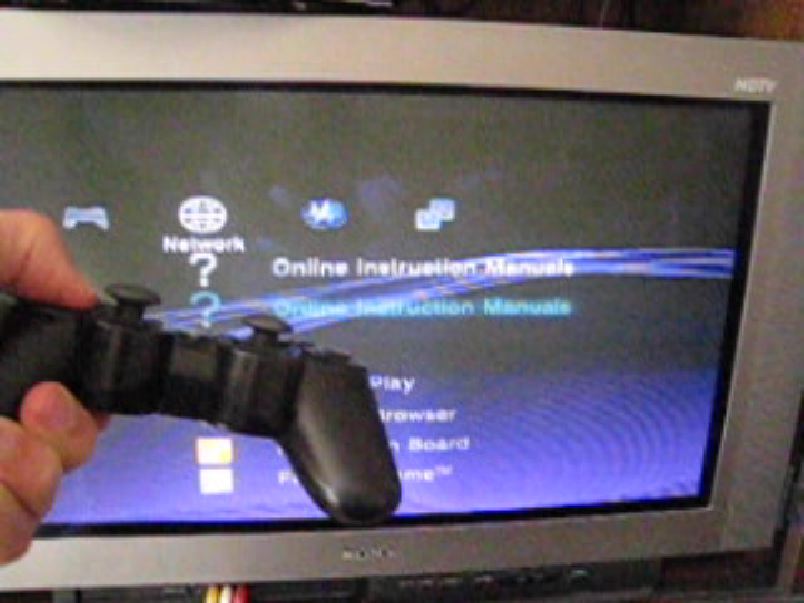
To find how much lag your TV adds, you need to compare an easily measured response with the same response on a CRT TV, or with a known value. To simplify things for you I’ve measured the response time of the PS3 system menus, which come out at a very solid 3/60ths on a CRT, and 5/60th on the plasma TV shown above. Hence I need to subtract 2/60th of a second to get an accurate measure of responsiveness when using the plasma for measurements. Make the appropriate adjustment for your TV.

This additional lag, however, should not be ignored, and it should be taken into account when developing the game. Many people will run your game on a TV that introduces additional lag. Steps should be taken to minimize the negative effects this unavoidable lag can have.

To measure the response time (lag) the simplest tool I found has been the free Quicktime viewer. With Quicktime installed, right click on the video file from your camera, and then click on “Open with Quicktime”. You can then use the arrow keys to frame advance 1/60th at a time. (On a Mac, it works best to use Quicktime Player 7, which can be found in the Utilities folder)

For a particular response time, navigate the video to the first frame that shows the button fully pressed, and then count additional frames from there until you see the first indication of a response on screen. The number of frames you counted is your response time in 1/60ths of a second. You can convert to milliseconds by dividing by 60 and multiplying by 1000 (12/60ths is 200 ms)

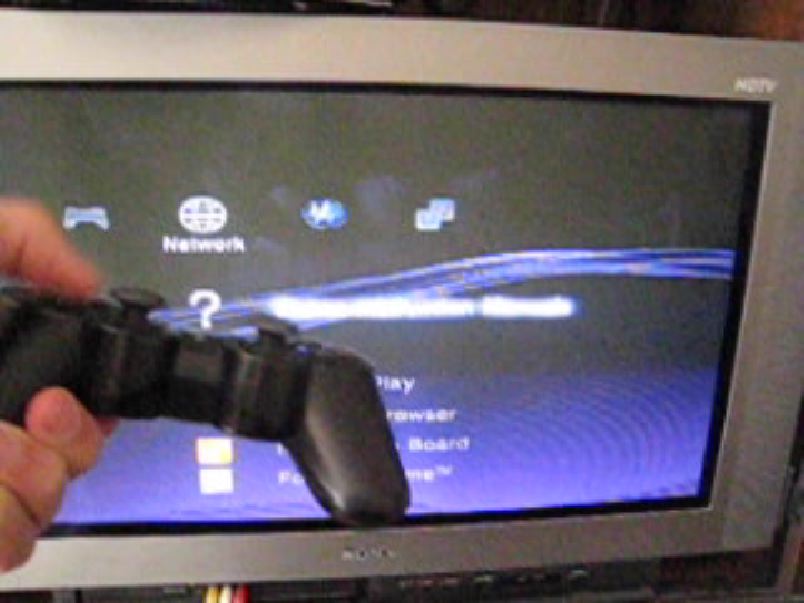
Here are the frames for the PS3 system menu on the CRT TV:

In this first image (above), the thumb is descending to the “down” button on the D-Pad. It’s important to press the buttons with the thumb starting off the pad and use a rapid hitting motion, so you can see the precise frame when the button is fully pressed. Note the slight motion blur on the thumb – this is also a useful indicator of if it is still moving or not.

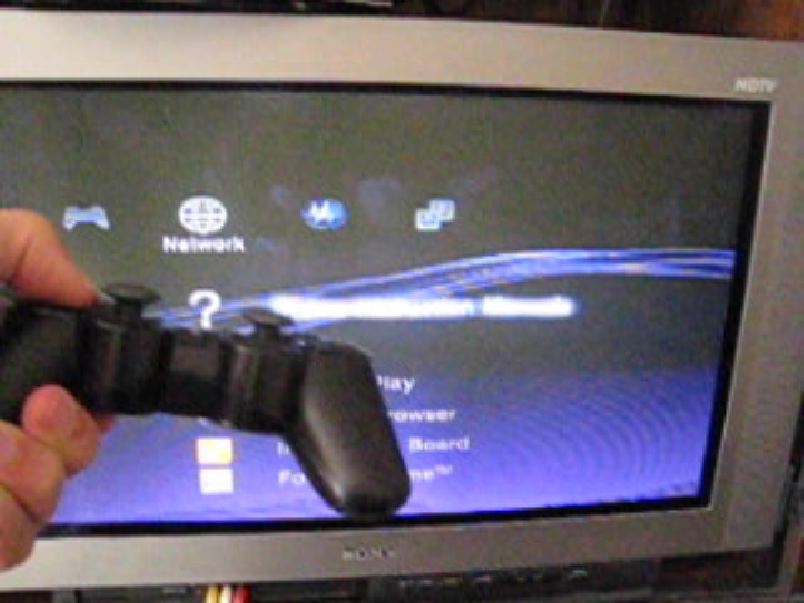
Now the thumb is clearly stopped and is pressing the button. Since this is the first frame where we see the button pressed, then we start counting from here, at zero (if the response were visible here, you’d have zero lag, impossible with current systems).

Now (above) we are on the first frame of actual lag, note the same line on the menu is still highlighted.

Second frame of lag, still no change

Third frame. The menu begins to move. This means that the PS3 system menu has a response time of 3/60ths of a second, or 50 ms (milliseconds). This is VERY GOOD, and is the fastest you can realistically expect from the PS3. While it’s theoretically possible to go to 2/60ths, this has severe performance problems. I don’t think 1/60th is possible on the PS3. So – all games running at 60 fps should shoot for 3/60ths as an ideal response time. This also means games running at 30 fps should shoot for 6/60ths. That’s in a perfect world, and as we shall see, actual results vary.

RESULTS FOR GTA-IV

The first thing I tried was shooting a gun in GTA-IV for the PS3 on a plasma television. This is done with the right trigger button (R2), which feels (slightly) like pulling the trigger of a real gun. In real life, there is zero delay between the trigger reaching the end of it’s travel, and the bullet leaving the gun. In GTA-IV, this delay is somewhat longer. Here’s the actual movie, so you can frame advance it yourself, and here are the relevant frames:

Note on the first frame (-1) , the finger is still moving, we start counting on the next frame (0) when the finger is fully on the button and the button is fully depressed. We then count until the first response, which comes at frame 12. This indicates a response time of 12/60ths. Since it’s measured on the plama TV, we adjust this to 10/60ths. This gives us a raw response time for GTA-IV of 166 ms (200 ms on flat panel TVs).

I repeated this test for turning and jumping, and got the same results. This is rather a long response time, and correlates with people reporting the game being sluggish and unresponsive. The delay in firing the gun after pulling the trigger is quite noticeable.

OTHER RESULTS

I tested various other games, with various results. I’ll list the results in 60ths of a second, and the results have been adjusted -2 to account for the plasma lag. All games are on the PS3 unless noted otherwise, and I’ve included the PS3 system menus and GTA for reference.

Games that run at 60 fps:

  • PS3 System menus: 3/60ths
  • Guitar Hero 3 (XBox 360): 3/60th
  • Ridge Racer 7: 4/60ths
  • Virtua Tennis: 4/60ths
  • Ninja Gaiden Sigma: 4/60ths
  • PixelJunk Racers 4/60ths

Games that run at 30 fps:

  • Genji: days of the Blade: 6/60ths
  • Tony Hawk’s Proving Ground: 8/60ths
  • Blacksite: Area51: 8/60ths
  • Halo 3 (XBox 360) : 8-10/60ths
  • EA’s “Skate”: 10/60ths
  • GTA-IV: 10/60ths
  • Harry Potter: 10-14/60ths
  • Heavenly Sword: 7-18/60ths

The first question that arises is: why are there no PS3 games with a response time of 3/60ths? The PS3 UI runs at 3/60ths response time, so it’s quite possible. Why do all the 60fps games run at 4/60ths? Still, that’s still pretty good, and those games all feel quite responsive. Guitar Hero on the XBox manages a very impressive 3/60ths – very important for that type of game, especially when it’s actually 5/60ths on many TVs.

Next, why so much variance between the 30fps games – ranging from 6/60ths to 18/60ths?

It’s worth noting that while EA’s Skate seems like it would be a bit sluggish at 10/60ths, it actually feels quite responsive, in large part due to its use of stick gestures for input, as the movement starts before the gesture is complete, yet the player mentally synchronizes it with the end of the gesture, and so it actually seems very responsive.

Then what about the games where the lag varies? Harry Potter is 10-14 which is bad enough, but Heavenly Sword is an astonishing 7-18. It takes 7/60ths to start an attack, but 18/60ths to start to turn around (See movie: mvi_4263w). Clearly something is wrong there. I would consider that a bug. It’s sad that the programmer made the effort that allowed for a 7/60th response time, but then someone else messed up down the line, making the turn take nearly a third of a second. Halo 3 is another example, with the shooting and moving being 8, but the jumping being 10.

Particularly interesting here in the 30fps category is Genji: days of the blade. This is a very similar game to Ninja Gaiden, and yet Genji runs at 30, while Ninja Gaiden runs at 60. However, the fact that Genji runs at 30 is barely noticeable, and does not detract from the game at all. In part this is because of the way the camera moves smoothly through the scene with very few rapid pans. It’s also because of the low contrast graphics and motion blur. But it’s also because Genji’s response rate is 6/60ths, very similar to Ninja Gaiden’s 4/60ths.

Ninja Gaiden is a faster paced game than Genji, with the main character jumping around rapidly, and the camera tightly following him – so the graphical benefits of 60fps are more apparent. The low response time feels good as well. However, since Genji also has a low response time, it would benefit very little from running at 60 fps. As it runs at 30fps, this gives the designers the opportunity to put more graphics, enemies and special effects on screen, and reduces the pressure on programmers and artists to constantly strive to maintain 60, which can be a difficult factor in development.

CONCLUSIONS AND SUGGESTIONS

Games that run at 60fps all seem to have a response time to 4/60ths, and while 3/60ths is possible, 4/60ths is a very good response time.

Some games running at 30fps have a response time of 8/60ths or 10/60ths (and some peak even higher). Genji shows us that a response time of 6/60ths is possible while running at 30 fps. 10/60ths can be too long, especially when combined with the processing delays in flat panel TVs which can push it up to 12/60ths. 1/5th of a second (200ms) is too long to wait for a gun to fire, and introduces annoying sluggishness when moving around or steering a car.

Some games have an inconsistent response time. Heavenly Sword varies from 7 to 18. If the system is capable of 7, then all moves should start in 7. Developers should verify ALL their response times, as other factors, such as animation, might be creating lag in specific places.

I suggest that game developers use this simple technique to measure the response time in their games, at least to verify that their assumptions are correct. If they are running at 60fps, then they should not be above 4/60ths. If they are running at 30fps, then they strive to duplicate Genji’s responsiveness of 6/60ths, and certainly not slip below 8/60ths. I suggest that they keep in mind that flat panel TVs (which are probably a majority in gamers households, and certainly in game reviewers’ households) add an additional 2 frames of lag, which makes it EVEN MORE important to keep programmed lag to a minimum.

I also suggest that game reviewers begin to use this technique to measure lag, and to include the measurement of lag in their reviews. While the subjective views of the reviewer are important and valuable, an objective measurement of response time would be a very useful additional piece of information for the person considering buying the game. Placing this information in a game review would encourage developers to produce more responsive games, which benefits everyone.

[Update Oct 2009] See this article that discusses some more refined techniques for measuring controller la:

http://www.eurogamer.net/articles/digitalfoundry-lag-factor-article

May 27, 2008

Programming Responsiveness

Filed under: Game Development — Mick West @ 1:53 pm

[Update: This is a technical article on the causes of lag.   If you want the article on measuring lag, then click here]

Responsiveness is something that can make or break a game at first impression. This is especially true in reviews where a game with poor responsiveness will be described as being “sluggish”, “unresponsive”, “floaty” or “sloppy”. A better game might be referred to as “tight” or “responsive”. There are several factors that contribute to perceived responsiveness. This article looks at some of them from a programmer’s perspective, and offers some routes to making your game more responsive.

RESPONSE LAG

Response lag is the delay between the player triggering an event, and the player getting feedback (usually visual) that the event has occurred. If the delay is too long, then the game will feel unresponsive. Several factors contribute to the length of this response lag. If your game is unresponsive, it may well be the cumulative effects of four or five different factors. Adjusting one factor alone may not make a perceptible difference, but addressing all the factors can lead to a noticeable improvement.

Players, and sometime even designers, cannot always put into words what they feel is wrong with a particular game’s controls. Often they will try to do something that requires some synchronization, but will fail, and they won’t be able to tell you “the event happened 0.10 seconds after my input”, instead they will just tell you that the game felt “slow” or “not tight”, or “difficult”. Or they might not be able to tell you anything, and simply say the game sucked, without really understanding why it sucked. Designers and programmers need to be aware of response lag, and the negative effect it has on a game, even if test players do not directly report it as a factor.

WHY LAG HAPPENS

To understand why lag occurs, you need to understand the sequence of events that occur from the time the user presses a button, to when the results appear on screen. To understand this, we need to look at the main loop structure of the game. The main loop performs two basic tasks: logic and rendering. The “logic” portion of a main loop updates the game state (the internal representation of the game objects and environment), while the “rendering” portion of the loop creates a frame that is displayed on the television. At some point in the main loop (usually at the start) we also get input from the user. This is sometimes considered a third task in the main loop, but it’s also commonly a part of the logic task. I’ve kept it separate here because it’s important to see in what order things happen

LISTING 1 – THE SIMPLEST MAIN LOOP

while (1) {
  Input();
  Logic();
  Rendering();
}

There are several ways a main loop can be structured. The simplest is shown in listing 1, where we simply alternate calling the logic and the rendering code. It is assumed there is some frame synchronization in the call to Rendering(), and that we are running at a fixed frame rate, usually 60 or 30 frames per second for an NTSC console game.

The main loop here is also only showing half the story. The call to Rendering() is doing the CPU side of the rendering task, which is iterating over the environment and the objects, culling, animating, sorting, setting up transforms, and building a display list for the GPU to execute. The actual GPU rendering is performed after the CPU rendering, and usually is asynchronous, so while the main loop is processing the next frame, the GPU is still rendering the previous frame.

So where does the lag come in? Look at the sequence of events that occur from the user pressing a button to there being some feedback for pressing that button. A the highest level, the user presses a button, the game logic reads that button press and updates the game state, the CPU render function sets up a frame with this new game state, then the GPU renders it, and finally this new frame is displayed on the television.

Figure 1 shows this in a more graphical manner. Sometime in frame 1, the player presses a button to fire his gun. Since the input processing has already been done for that frame, this input is read in frame 2. Frame 2 updates the logic state based on this button press (a shot is fired). Also in frame 2, the CPU side of rendering is performed with this new logic state. Then on frame 3, the GPU performs the actual rendering of this new logic state. Finally at the start of frame 4, the newly rendered frame is presented to the user by flipping the frame buffers.

So how long is the lag? It depends on how long a frame is (where a “frame” here is a complete iteration of the main loop). It takes up to three frames for the users input to be translated into visual feedback. So if we are running at 30 frames per second, then the lag is 3/30th or 1/10th of a second. If we are running at 60 frames per second, then the lag will be 3/60th or 1/20th of a second.

This illustrates a common misconception about the difference between 60 fps and 30fps games. Since the difference between these two frame rates is just 1/60th of a second, people assume that the difference in responsiveness will also be 1/60th. In actual fact, going from 60 to 30 does not just add a vsync to your lag, it acts as a multiplier, doubling the length of the process pipeline that is responsible for lag. In our ideal example in figure 1, it adds 3/60ths of a second, not 1/60th. If the event pipeline is longer, which it quite possible can be, then it can add even more.

Figure 1 actually illustrates the best possible sequence of events. The button press event is translated into visual feedback via the shortest path possible. We know this because we can clearly see the sequence of events. As a programmer, being familiar with the order in which things happen is a vital part of understanding why thing act the way they do in the game. It quite easy to introduce additional frames of lag (meaning an extra 1/60th or 1/30th of a second delay), by not paying careful attention to the order in which things happen.

As a simple example, consider what would happen if we switched the order of the Logic() and Rendering() calls in our main loop. Look at frame 2 of figure 1, although the input is being read at the start of frame 2, and affects the logic during frame 2, the rendering is performed first, and so is using the logic state from frame 1. This introduces an extra frame of lag. While this is a novice level mistake, it is still something you need to make absolutely sure is not happening.

Extra frames of lag can be introduced in a more subtle manner as a result of the order of operations within the game logic. In out example we are firing a gun. Now perhaps our engine is set up to increment the position of the objects in the world using a physics engine, and then handle events that are raised due to this update (such as collision events). So in this situation the sequence of input/logic looks like listing 2.

LISTING 2 – PHYSICS UPDATE IS FOLLOWED BY EVENT HANDLING

void Logic() {
  HandleInput();
  UpdatePhysics();
  HandleEvents();
}

Now event handling via messages is a very nice way of decoupling systems. So a programmer might decide to use it for the player control events. To fire a gun, the HandleInput() function will fire an event telling the gun to fire. The HandleEvents() function will take this event and cause the gun to actually fire. But because the physics update has already happened for this frame, the effect on the world state will not be incorporated until the next frame, hence introducing an extra frame of lag.

MORE LAG CAUSES

The lag can be extended even further by lower level action ordering. Consider a “jump” – the feedback comes when the character actually moves. To make something move in a game, you can either set the velocity directly, or you apply a force to it, either acceleration or, more likely, a momentary impulse. The problem arises here if in your physics engine then positions are updated before the velocity change is applied (a common situation in many introductory game programming tutorials). In this case, although the velocity of the jumping object will be set on the same frame as the input event is handled, the object will not actually begin to move until the next time around the loop, on the next game frame, and so introduces an additional frame of lag.

Remember these are cumulative problems that can be difficult to discern in isolation, but the combined effect can make your game controls turn to mush. Suppose you had made all three mistakes listed above: you do rendering before logic, you handle logic events after advancing the physics state, and you update position before velocity. That’s three additional full iteration of the main loop, in addition to the three you already have built in. Six frames of lag between the player pressing a button, and seeing the result on screen. At 60 frames per second that’s 1/10th of a second, which is bad enough, but if the game is running at 30 frames per second, then the lag is DOUBLED to an unbearable 1/5th of a second, or 200ms.

Other factors can contribute to lag, compounding even further the effects above. Movement can be driven by animations, with velocity changes built into specific time points in an animation. The obvious problem here is if the animator places the jump velocity impulse a fraction of a second into the animation, to better match the visuals. It might look better, but it feels bad. That’s easily dealt with by making sure the velocity impulse is on the first frame of animation when immediate feedback is needed. But then the question is: how does triggering an animation translate into actual movement? It’s quite likely that animation updating is handled by the Render() function, and so any events triggered by the animation will not be handled until the time around the loop, which adds another frame. In addition, triggering an animation might not make it advance a frame until the next frame, delaying the event firing for a frame. Our lag could potentially be increased from six to eight frames, which would be quite unplayable, even at 60 frames per second.

That’s not the end of it either. There are many ways in which extra frames of lag can be introduced. You might be pipelining your physics on a separate thread (or a physics processing unit). You might be using triple buffering to smooth your frame rate. You could be using abstract events that take a couple of passes through the system to resolve into real events. You could be using a scripting language that adds an additional frame in the way it waits for an event. It’s quite possible to make you game logic incredibly flexible by abstracting various concepts of time and events, and yet while doing this you loose sight of exactly what is going on under the hood, making it far easier for additional frames of delay to creep in.

RESPONSIVENESS IS NOT REACTION TIME

On of the great misconceptions regarding responsiveness is that it is somehow connected to human reaction time. Humans cannot physically react to a visual stimulus and then move their fingers in less than one tenth of a second, and peak reaction times vary from 0.15 seconds to 0.30 seconds, depending on how “twitchy” the gamer is. Figures such as these are often brought up in discussion of game responsiveness, but the connection is specious.

It’s not how fast you react to the game that is the issue; it’s how fast the game reacts to you. The issue is not one of reaction times, but of synchronization. In games such as Guitar Hero there are things coming towards you, and you have to hit the correct button at a very precise point in time, when the target object is within a particular region. The player is anticipating the future event, and there is no reaction involved at all. The problems of lack of responsiveness occur when the game does not react fast enough to the player, and the target object has moved beyond the target region by the time the event occurs. The player presses the button at the correct point, and they do not expect the object to move even a few more pixels before it explodes. But since objects generally move at least a few pixels per frame, having a few frames of lag can allow the object to drift past its target.

Many action games are based around this anticipation and button pressing. In a skateboarding game you want to jump just before you hit the end of a rail. In a shooter, you want to shoot the instant someone moves in front of your gun. Again this is not reaction time, you will usually have seen the target at least half a second before you shoot it, probably more, and will be either moving the gun, or waiting for the target to move in front of the gun.

Because of the somewhat unintuitive nature of these problems, in order to create a responsive game, it is important that you fully understand the issues involved. The most important thing is to be able to clearly describe the frame by frame path though your logic and rendering that the action a button being pressed will take in order to create visual feedback. Once you have this, you can optimize it as close to the optimal pathway as possible.

« Newer PostsOlder Posts »

Powered by WordPress